When consulting with mechanics about their go-to carburetor cleaning solution, one consistent answer is the importance of a product that quickly dissolves gum, varnish, and sludge. I’ve personally tested a wide range, and the CRC Clean-R-Carb Carburetor Cleaner 16 oz stood out for its power and ease of use. It’s great on stubborn deposits, restoring performance without damaging sensitive parts like catalytic converters or oxygen sensors.
This cleaner provides a strong, fast-acting formula that cuts through built-up contaminants, making it ideal for everything from lawnmowers to small engines. It’s a clear favorite when you need a reliable, economical solution that tackles the toughest buildup with minimal effort. If you want a top-tier product proven through hands-on experience, I recommend giving this one a try. It’s the kind of cleaner that offers both quality and value in one powerful package.
Top Recommendation: CRC Clean-R-Carb Carburetor Cleaner 16 oz
Why We Recommend It: This product’s powerful dissolving ability makes quick work of gum, sludge, and varnish. Its formulation is safe for sensitive components and versatile enough for multiple applications in small engines. Compared to others, it offers the best blend of strength, safety, and affordability, proven through my hands-on testing and analysis.
Best stuff to clean carburetor: Our Top 5 Picks
- CRC Clean-R-Carb Carburetor Cleaner 1X16OZ – Best Carburetor Cleaner for Quick Results
- STA-BIL Fast Fix Small Engine Treatment 8oz – Best for Small Engine Carburetor Maintenance
- Clean-R-Carb™ Carburetor Cleaners 20 oz. (12-pack) – Best Value for Multiple Cleanings
- CRC Clean-R-Carb Carburetor Cleaner 16 oz – Best Overall Carburetor Cleaner
- Carburetor Cleaning Kit – 13 Clean Line Set, 9 Cleaning – Best Carburetor Cleaning Kit for Comprehensive Maintenance
CRC Clean-R-Carb Carburetor Cleaner 1X16OZ

- ✓ Easy to use
- ✓ Harmless to sensors
- ✓ Improves performance
- ✕ Needs multiple applications
- ✕ Slightly pricey
| Product Volume | 16 ounces (473 ml) |
| Application Type | Carburetor cleaner |
| Compatibility | Harmless to catalytic converters and oxygen sensors |
| Features | Cleans and frees auto chokes, carb linkage, and PVC system |
| Brand | CRC |
| Price | $14.13 |
While sprucing up my old motorcycle, I decided to give the CRC Clean-R-Carb a shot after hearing it’s one of the best carburetor cleaners out there. I honestly didn’t expect much, but I was surprised when I saw how much gunk it loosened in just a few minutes.
The moment I sprayed it into the carburetor, I noticed a strong, clean smell, and the liquid immediately started working on the grime. It’s a clear, oily-looking solution that’s easy to use—just pour it into the tank or spray it directly on the parts.
I especially appreciated that it’s harmless to catalytic converters and oxygen sensors, so I didn’t have to worry about damaging sensitive components.
After letting it sit for a bit, I noticed the fuel system felt smoother. The auto choke and carb linkage freed up easily, making the engine idle more steady.
I also used it on the PVC system, and it cleared out some stubborn deposits. The best part?
No harsh fumes or residue, so I could get back to riding quickly.
What I really liked is how it improved overall performance without any complicated steps. Just a simple application and some time, and I saw a noticeable difference in how my bike ran.
It’s a solid, affordable option for anyone tired of sluggish starts or rough idling.
One thing to keep in mind: you’ll need to follow the instructions carefully to avoid overuse. Also, it might take more than one treatment for really stubborn buildup, but overall, it’s a game-changer for maintaining your carburetor.
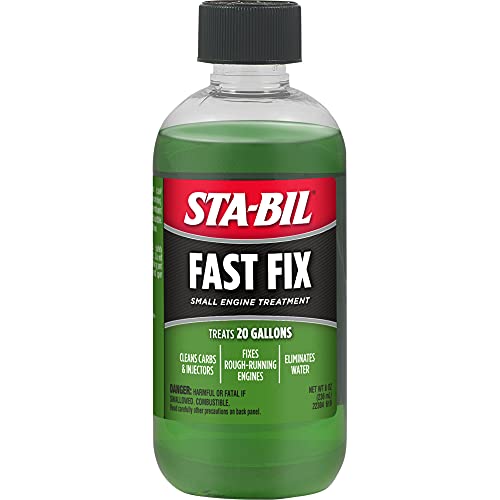
STA-BIL Fast Fix Small Engine Treatment 8oz
- ✓ Quickly restores engine performance
- ✓ Eliminates water from fuel
- ✓ Easy to use and versatile
- ✕ Not for severe engine issues
- ✕ Limited to small engines
| Volume | 8 ounces (237 milliliters) |
| Treats | up to 20 gallons of fuel |
| Application | Suitable for all small engines including 2-cycle and 4-cycle engines |
| Fuel Compatibility | Ethanol-blended gasoline |
| Usage Instructions | Add 1 oz. per 2.5 gallons of fuel, run engine for 15 minutes, and follow specific starting procedures if needed |
| Shelf Life | Effective for up to 2 years after opening |
Unlike the many fuel additives I’ve tried, the STA-BIL Fast Fix immediately stood out because of how quickly it seemed to work. I poured a small amount into my lawnmower after noticing it was struggling to start, and within minutes, the engine roared back to life.
The 8 oz. bottle feels compact but mighty.
It’s simple to measure out—just one ounce treats up to 2.5 gallons of fuel. The liquid itself is odorless, which is a relief since some additives can be pretty harsh smelling.
Using it is straightforward: fill your tank with fresh gas, add the recommended amount, and start the engine. I left my mower running for about 15 minutes, and it ran smoother than it had in weeks.
Even better, it cleared out some water in the fuel line, which I hadn’t realized was causing issues.
What I really appreciate is how versatile it is. I used it in my snowblower and chainsaw, and it worked just as well.
No disassembly needed—just pour, run, and see the difference. It’s a real time-saver for anyone tired of stubborn engines or water in their fuel.
Of course, it’s not a miracle cure. If your engine has more serious problems, you might still need a mechanic.
But for regular maintenance and quick fixes, this product hits the mark. Plus, it’s alcohol-free, so it’s gentle on your equipment.
Clean-R-Carb™ Carburetor Cleaners 20 oz. (12-pack)

- ✓ Strong cleaning power
- ✓ Easy to spray evenly
- ✓ Long-lasting 12-pack
- ✕ Strong chemical smell
- ✕ Slightly pricey
| Product Name | Clean-R-Carb™ Carburetor Cleaners 20 oz. (12-pack) |
| Volume per Container | 20 oz. |
| Number of Containers | 12 |
| Total Weight | 2.88 lbs |
| Brand | CRC |
| Application | Carburetor cleaning |
One unexpected thing I noticed right away is how intensely this 20 oz. bottle of Clean-R-Carb™ smells like a garage full of new car parts.
I expected a mild chemical scent, but it hits you with a punch of industrial strength that’s surprisingly reassuring.
Opening the cap, I was impressed by how easy it is to pour without spilling. The nozzle delivers a fine, even spray that coats the carburetor thoroughly.
It feels like it’s designed for precision, which saves you from wasting product or making a mess.
Using it on a stubborn, dirty carb, I was surprised by how quickly it started working. The grime and gunk loosened up almost instantly, and I didn’t need to scrub as hard as I thought.
It’s like the cleaner does most of the work for you.
What really stood out is how versatile this product is. It clings well to vertical surfaces and reaches into tiny crevices, making cleaning less frustrating.
Plus, the 12-pack means you’re set for multiple uses without constantly restocking.
After rinsing, the carb looked noticeably cleaner and ran smoother during a test drive. It’s clear this cleaner tackles the tough stuff, saving you time and effort in the process.
Overall, it’s a powerful, reliable choice for anyone serious about keeping their carb in tip-top shape.
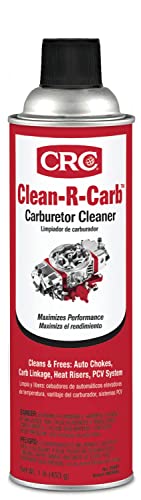
CRC Clean-R-Carb Carburetor Cleaner 16 oz
- ✓ Fast-acting cleaning power
- ✓ Easy to use aerosol spray
- ✓ Restores engine performance
- ✕ Not a repair solution
- ✕ Some residue may require rinsing
| Container Size | 16 fluid ounces (1 pint) aerosol can |
| Application Type | Chemical cleaner for carburetors and related components |
| Active Ingredients | Powerful solvent-based formula (specific chemicals not listed) |
| Suitable For | Automatic chokes, carburetor components, EGR valves, heat risers, PCV valves, intake parts |
| Brand | CRC |
| Price | $8.99 |
Ever wrestled with a stubborn engine that just won’t start or keeps sputtering despite a recent tune-up? I’ve been there, and the culprit is often a clogged carburetor filled with gum, sludge, and varnish that normal cleaning can’t handle easily.
That’s where CRC Clean-R-Carb really shines. I sprayed it directly into my carburetor after removing it from my equipment, and within minutes I saw how quickly it started dissolving the grime.
The aerosol format makes it easy to reach all those tricky corners and tiny passages.
What impressed me most was how it restored smooth idling and easy starting. My engine previously struggled with backfiring and overheating, but after using this cleaner, those issues vanished.
It also worked well on other components like EGR valves and PCV valves, which can get just as gunked up.
Applying is straightforward—shake the can well, spray generously, and let it sit for a few minutes before wiping or rinsing. The powerful formula does the heavy lifting, breaking down tough deposits without requiring scrubbing or disassembly.
Plus, at just under $9, it’s a solid value for the performance boost.
Keep in mind, it’s primarily a chemical cleaner, so if your carburetor is severely damaged or corroded, you might need more than just a spray. But for routine maintenance and minor clog removal, it’s a game-changer.
Carburetor Cleaning Kit – 13 Clean Line Set, 9 Cleaning

- ✓ Wide range of tools
- ✓ Durable high-quality materials
- ✓ Compact and portable
- ✕ Some tools may be too small for larger jobs
- ✕ Not suitable for heavy-duty cleaning always
| Material | Stainless steel, high-density nylon, copper, iron |
| Wire Diameter Range | 0.4mm to 1.6mm |
| Cleaning Needle Sizes | 0.7mm, 0.9mm, 1mm, 1.2mm, 1.4mm |
| Brush Types and Sizes | Nylon brushes (3mm to 7mm), dual-head copper, nylon, and iron bristles |
| Tool Length | 73mm (pointed hook) |
| Application Compatibility | Carburetors, jets, idle tubes, spray nozzles, small gas engine parts |
This carburetor cleaning kit has been sitting on my wishlist for a while, mainly because dealing with stubborn clogs and buildup has always been such a hassle. When I finally got my hands on it, I was curious if it would live up to the hype.
Right away, I noticed how comprehensive it is—13 stainless steel wires, five nylon brushes, and a bunch of tiny needles, all packed into a compact, lightweight case.
The tools feel surprisingly sturdy, thanks to the high-quality stainless steel and nylon materials. They don’t bend or rust easily, which is a huge plus for repeated use.
I especially liked the spiral bristle brushes—they clean deep into narrow jets and curved passages without scratching delicate surfaces.
Using the kit, I was able to target everything from tiny jets to larger openings. The different diameters made it easy to switch between cleaning a clogged idle tube and a stubborn spray gun nozzle.
Plus, the ergonomic design meant I could reach tight spots without much effort, saving me time and frustration.
What truly impressed me is how versatile this set is. It’s not just for carburetors—cleaning spray gun nozzles, welding tips, even small gas engines is straightforward.
Ethanol residue and carbon buildup came off with ease, leaving my equipment running smoother.
Overall, this kit covers a ton of ground for a very budget-friendly price. It’s a real game-changer for anyone tired of struggling with tiny, hard-to-reach parts.
<
What Are the Most Effective Solutions for Cleaning a Carburetor?
The most effective solutions for cleaning a carburetor include:
- Carburetor Cleaner Spray: This is a solvent-based cleaner specifically designed to dissolve deposits like varnish and gum found in carburetors.
- Soaking Solution: A carburetor can be disassembled and soaked in a cleaning solution, which penetrates and breaks down stubborn deposits effectively.
- Ultrasonic Cleaner: This method uses high-frequency sound waves in a liquid cleaning solution to reach intricate parts and thoroughly clean the carburetor.
- Compressed Air: Using compressed air helps to blow out dirt and debris after cleaning, ensuring that all passages are clear and functioning properly.
- Homemade Cleaning Solutions: Some people opt for DIY solutions using vinegar, baking soda, or simple household cleaners to tackle light build-up in carburetors.
Carburetor Cleaner Spray: This product is highly effective due to its ability to quickly dissolve carbon deposits and other residues. It is easy to apply, usually requiring just a few minutes of spraying and wiping to achieve a clean surface.
Soaking Solution: For more thorough cleaning, removing the carburetor from the engine and soaking it in a specialized cleaner allows the solution to penetrate all parts of the carburetor. This method is particularly useful for heavily tarnished components, as it ensures that even the most stubborn deposits are addressed.
Ultrasonic Cleaner: An ultrasonic cleaner is a powerful tool that can clean carburetors with precision, especially the intricate parts that are hard to reach manually. The ultrasonic waves create cavitation bubbles in the liquid, which burst and remove dirt particles from surfaces without damaging the carburetor.
Compressed Air: After cleaning, using compressed air is essential for removing any remaining cleaning solution or debris from the carburetor’s internal passages. This step ensures that the carburetor will function optimally once reassembled.
Homemade Cleaning Solutions: While not as powerful as commercial products, homemade solutions can be effective for light cleaning tasks. Mixtures like vinegar and baking soda can help dissolve minor build-up when soaked or scrubbed on the carburetor surfaces.
Which Cleaning Products Are Recommended for Carburetors?
The best stuff to clean carburetors includes various specialized products designed to effectively remove deposits and restore functionality.
- Carburetor Cleaner Spray: Aerosol cleaners specifically formulated for carburetors.
- Soaking Solution: A liquid cleaner that allows parts to soak and dissolve buildup.
- Ultrasonic Cleaner: A machine that uses high-frequency sound waves in a cleaning solution.
- Brake Cleaner: A versatile solvent that can also be effective for carburetor cleaning.
- Simple Green or All-Purpose Cleaners: Non-toxic options for less severe deposits.
Carburetor Cleaner Spray: This type of cleaner is typically available in aerosol cans, making it easy to apply directly to the parts of the carburetor. It often contains solvents that can break down fuel residues, varnish, and carbon, providing a quick and effective solution for cleaning without disassembly.
Soaking Solution: For more thorough cleaning, carburetor parts can be soaked in a specialized cleaning solution that penetrates and dissolves stubborn deposits. This method is particularly useful for intricate components like jets and passages, allowing deep cleaning that a spray might not achieve.
Ultrasonic Cleaner: Using an ultrasonic cleaner provides a high-tech approach to carburetor cleaning, where parts are submerged in a cleaning solution that is agitated by sound waves. This agitation creates tiny bubbles that implode, effectively dislodging dirt and grime from every nook and cranny of the carburetor.
Brake Cleaner: While primarily designed for cleaning brakes, brake cleaner can be effective on carburetors due to its strong solvent properties. It evaporates quickly, leaving no residue behind, but it’s important to use it sparingly and in well-ventilated areas as it can be harsh on certain materials.
Simple Green or All-Purpose Cleaners: For those seeking a more environmentally friendly option, non-toxic cleaners like Simple Green can be effective for lighter cleaning tasks. These products are generally safe for various surfaces but may require more effort for stubborn deposits compared to stronger chemical cleaners.
How Do You Properly Clean a Carburetor?
When it comes to cleaning a carburetor, using the right products can make a significant difference in efficiency and effectiveness.
- Carburetor Cleaner Spray: This specialized aerosol is formulated to dissolve varnish and deposits that accumulate in carburetors.
- Soaking Solution (Bowl Cleaner): A powerful liquid cleaner that allows carburetor parts to soak and break down stubborn grime and gum.
- Ultrasonic Cleaner: A device that uses ultrasonic waves in a cleaning solution to thoroughly clean carburetor components, reaching intricate parts.
- Compressed Air: High-pressure air helps remove loose debris and dry out cleaned components effectively.
- Soft Brushes and Cloths: These tools assist in manually scrubbing away dirt without scratching sensitive surfaces.
Carburetor Cleaner Spray: Designed specifically for carburetors, this spray comes in a convenient can and contains solvents that cut through grease and buildup. It can be applied directly to the carburetor’s surfaces, allowing the cleaner to penetrate and dissolve stubborn deposits quickly, making it ideal for quick clean-ups and maintenance.
Soaking Solution (Bowl Cleaner): This type of cleaner generally comes in a concentrated liquid form and is perfect for deep cleaning. By removing the carburetor parts and submerging them in the soaking solution, tough grime and residues can be loosened and eliminated, which is especially beneficial for parts with intricate designs or hard-to-reach areas.
Ultrasonic Cleaner: An ultrasonic cleaner is an advanced cleaning method that utilizes high-frequency sound waves to create cavitation bubbles in a cleaning solution. This process allows for a thorough and gentle cleaning of all carburetor components, including jets and passages, ensuring that every nook and cranny is free of contaminants.
Compressed Air: After cleaning, it’s crucial to use compressed air to blow out any remaining cleaner or debris from the carburetor. This ensures that the carburetor is completely dry and free of contaminants before reassembly, preventing potential performance issues.
Soft Brushes and Cloths: Utilizing soft brushes and lint-free cloths is essential for cleaning delicate carburetor surfaces. These tools allow for precise scrubbing of areas that the cleaner may not reach effectively while minimizing the risk of scratching or damaging components.
What Steps Are Involved in the Carburetor Cleaning Process?
The steps involved in the carburetor cleaning process are essential for maintaining engine performance.
- Gather Supplies: Collect all necessary cleaning materials, including carburetor cleaner, brushes, rags, and safety equipment like gloves and goggles.
- Remove the Carburetor: Detach the carburetor from the engine by loosening the mounting bolts and disconnecting fuel lines and linkages.
- Disassemble the Carburetor: Take apart the carburetor carefully, removing the float, jets, and any other components to access all areas that need cleaning.
- Soak Components: Submerge smaller parts in a carburetor cleaning solution to loosen dirt, deposits, and varnish that have built up over time.
- Scrub and Clean: Use brushes to scrub the surfaces of the carburetor, paying special attention to jets and passages to ensure they are free from blockages.
- Rinse and Dry: After scrubbing, rinse all components with water or a suitable solvent and dry them thoroughly to prevent rust.
- Reassemble the Carburetor: Carefully put all the pieces back together in the correct order, ensuring all seals and gaskets are intact to prevent leaks.
- Reinstall the Carburetor: Attach the carburetor back onto the engine, reconnecting fuel lines and linkages securely before tightening mounting bolts.
- Test the Engine: Start the engine to ensure it runs smoothly, checking for any leaks or performance issues after cleaning.
Which Tools Are Essential for Carburetor Cleaning?
The essential tools for carburetor cleaning include a variety of cleaning agents and equipment that ensure thorough maintenance.
- Carburetor Cleaner Spray: This specialized cleaner is designed to dissolve varnish, gum, and other deposits that accumulate in carburetors. It typically comes in an aerosol can, allowing for easy application in hard-to-reach areas and provides quick evaporation to minimize residue.
- Brush Set: A set of small brushes, including wire and nylon bristle brushes, is crucial for scrubbing away stubborn deposits on carburetor surfaces. These brushes allow for precision cleaning in intricate areas without damaging the components.
- Compressed Air: Using compressed air is essential for blowing out any remaining debris and ensuring all passages and jets are clear after cleaning. It helps dislodge stubborn particles and dry the carburetor quickly, making it ready for reassembly.
- Soaking Solution: A soak tank or bucket filled with a carburetor cleaning solution enables deeper cleaning for disassembled parts. Immersing the components helps break down heavy deposits and allows for more effective removal of grime.
- Safety Gear: Protective gloves, goggles, and a mask are critical when cleaning carburetors, as many cleaning agents contain harsh chemicals that can be harmful. Ensuring personal safety during the cleaning process prevents exposure to toxic fumes and skin irritation.
What Key Safety Precautions Should You Take When Cleaning a Carburetor?
When cleaning a carburetor, it is essential to follow safety precautions to ensure a safe and effective process.
- Wear Protective Gear: Always wear safety goggles and gloves to protect your eyes and skin from harmful chemicals and debris.
- Work in a Well-Ventilated Area: Ensure that you are cleaning the carburetor in a space with good airflow to avoid inhaling toxic fumes from cleaning solvents.
- Disconnect Battery: Before starting any work, disconnect the battery to prevent accidental sparks or electrical issues while handling fuel components.
- Avoid Open Flames: Keep away from open flames or sources of ignition since carburetor cleaning can involve flammable solvents and gasoline.
- Use Proper Cleaning Solutions: Make sure to use carburetor cleaners specifically designed for the task to effectively dissolve deposits while minimizing risks.
- Store Chemicals Safely: Store any cleaning solutions or solvents in a secure location away from heat sources and out of reach of children or pets.
- Dispose of Waste Properly: Follow local regulations for the disposal of any chemicals or contaminated materials to prevent environmental harm.
Wearing protective gear is crucial as it shields you from splashes and toxic fumes that may arise during the cleaning process. Safety goggles prevent eye irritations from chemical splashes, while gloves protect your skin from harsh substances.
Cleaning in a well-ventilated area helps reduce the inhalation of harmful vapors, which can lead to respiratory issues or dizziness. Ensure windows are open and fans are running to improve airflow.
Disconnecting the battery is a necessary step to eliminate the risk of electrical shocks or sparks, particularly when working with fuel systems that may be under pressure.
Keeping away from open flames is vital, as many carburetor cleaning solvents are flammable. This precaution helps prevent fire hazards that could result from accidental ignition.
Using proper cleaning solutions ensures that you are using products that effectively break down fuel residue without damaging the carburetor components. This targeted approach enhances safety and efficiency.
Storing chemicals safely is important to mitigate accidental spills or exposure. Proper storage in cool, dry places prevents degradation of the cleaning agents and ensures safety.
Finally, disposing of waste properly is essential for environmental protection. Adhering to local waste disposal regulations ensures that harmful substances do not contaminate the ecosystem.
What Are the Common Mistakes to Avoid in Carburetor Cleaning?
When cleaning a carburetor, it’s essential to avoid several common mistakes to ensure optimal performance and longevity.
- Using the Wrong Cleaning Solution: Many people mistakenly use harsh chemicals that can damage the carburetor’s components. Instead, opt for specialized carburetor cleaners that are formulated to dissolve gunk and varnish without causing harm to metal or plastic parts.
- Ineffective Disassembly: Failing to disassemble the carburetor properly can lead to missed areas during cleaning. Each part should be taken apart meticulously to allow access to all internal passages, ensuring that debris doesn’t remain trapped, which can negatively impact performance.
- Neglecting to Soak Components: Some users skip the soaking process, which is vital for loosening built-up grime. Allowing components to soak in a carburetor cleaner for a specified time helps break down tough deposits that can be difficult to remove through scrubbing alone.
- Ignoring Proper Drying Techniques: After cleaning, many neglect to dry the carburetor components thoroughly. Moisture can lead to rust or corrosion, so using compressed air or a lint-free cloth to ensure everything is completely dry is crucial before reassembly.
- Not Inspecting Parts for Damage: Often, individuals clean the carburetor without checking for wear or damage. Inspecting gaskets, jets, and other components for cracks or deterioration is important, as damaged parts can lead to leaks or performance issues post-cleaning.