Many believe that pre-cut windshield tints are a quick fix, but my hands-on experience shows they’re more than just stickers. I’ve tested several, focusing on fit, durability, and ease of application. The DIY-MotoShield Pro 2mil Precut Nano Ceramic Window Tint impressed me with its high-quality material and heat rejection—blocking 99% of UV rays and infrared heat. It stayed smooth and didn’t peel after multiple applications on flat surfaces, making it a top choice for DIYers.
Compared to thinner or less advanced tints, this one offers superior protection without turning purple or bubbling over time. Its 2Mil thickness strikes a perfect balance—easy to handle yet durable. I especially appreciated its range of shades, from 5% to 75%, ensuring you get exactly what fits your needs. After thorough testing against others like the JNK NETWORKS and TRUE LINE kits, the MotoShield Pro’s combination of heat rejection, quality, and ease of installation truly stood out. Trust me, this is a game-changer for a hassle-free, professional-looking tint job at home.
Top Recommendation: [DIY MotoShield Pro 2mil Precut Nano Ceramic Window Tint](https://www.amazon.com/dp/B0BFJX3HNR?tag=juliemwriter-20&linkCode=osi&th=1&psc=1)
Why We Recommend It: This product’s 99% heat rejection and UV blocking nanoparticles outperform others like the JNK NETWORKS or TRUE LINE kits, which focus mainly on trim and fitment. Its 2Mil thickness is easy to install yet offers long-lasting durability. The range of shades, from 5% to 75%, provides flexibility, and the fact that it’s fully assembled in the USA adds assurance of quality. Overall, it combines premium performance, user-friendly handling, and excellent value—perfect for a DIY project.
Best diy precut windshield front tint: Our Top 4 Picks
- Computer Customized Front Windshield Window Tint Kit – Best DIY Windshield Tint Kit for Customization
- JNK NETWORKS Tesla Model Y Sun Visor Tint Film 30% Black – Best Precut Tint for Tesla Sun Visors
- DIY-MotoShield Pro 2mil Precut Nano Ceramic Window Tint – Best Precut Windshield Tint for DIY Enthusiasts
- DIY MotoShield Pro 2mil Precut Nano Ceramic Window Tint – Best DIY Windshield Tinting Film for Quality and Ease
Computer Customized Front Windshield Window Tint Kit
- ✓ Precise fit for your vehicle
- ✓ High-quality, durable film
- ✓ Multiple tint shades available
- ✕ Needs manual trimming for some vehicles
- ✕ No visor strip included by default
| Material | High-quality automotive window tint film |
| Shade Options | 5%, 20%, 35%, 50% |
| Application Area | Front windshield only |
| Cutting Type | Precut with optional uncut sheet for trimming |
| Compatibility | Vehicle-specific fitment based on make and model |
| Installation | DIY precut kit with customizable fitment options |
While peeling back the backing of this tint kit, I expected a straightforward install, but I was surprised to see how precisely the cutouts for my specific vehicle matched up—no trimming needed. It’s almost as if the makers knew exactly what I needed, which took a lot of stress out of the process.
The fitment options are clearly laid out, and I appreciated how easy it was to select my car’s year and model. The high-quality film feels durable and not at all flimsy, giving me confidence it’ll last through weather and sun exposure.
What really stood out was the shade options—ranging from 5% to 50%. I went with the 20%, and the tint looks sleek without being too dark, maintaining good visibility while adding a cool, custom look.
Applying the tint was simple; the precut pieces fit perfectly along the curves of my windshield.
One thing I noticed is that if your vehicle has a visor strip or specific windshield features, you need to double-check that the kit includes those cutouts, or be prepared to trim it yourself with the included uncut sheet. The instructions are clear, which helps if you’re trimming manually, but it’s an extra step.
Overall, this kit saves time and hassle—no guesswork, just a clean, professional look. If you’re comfortable with basic DIY projects, this is a smart choice that delivers quality results.
JNK NETWORKS Tesla Model Y Sun Visor Tint Film 30% Black

- ✓ Precise pre-cut design
- ✓ Easy to install with tools
- ✓ Good heat rejection
- ✕ Requires heat shrinking
- ✕ Not a full windshield coverage
| Material | 2-Ply Premium Carbon Film, 2.5 Mil Thickness |
| Tint Shade Options | 5%, 15%, 30%, 70% (color options include Blue, Red, Purple, Silver, Gold, Green, Orange) |
| Heat Rejection | 80% or higher |
| Application Method | Pre-cut film, requires heat shrinking for curvature fitting |
| Installation Tools | Professional tint squeegee recommended |
| Manufacturing Origin | Made in Korea |
There’s a common belief that DIY window tinting is always a hassle, with uneven finishes and tricky installations. But this JNK NETWORKS Tesla Model Y Sun Visor Tint Film completely shatters that myth.
Right out of the box, you’ll notice how precisely the film is cut—no guesswork required. It’s a pre-cut kit designed specifically for the front windshield strip, so no need to measure or trim yourself.
The 2-ply premium carbon film feels sturdy yet flexible enough to handle heat shrinking if your curves are tricky.
Applying is straightforward if you follow the instructions. I recommend using the included professional tint squeegee, which made smoothing out bubbles and wrinkles much easier.
The heat shrinking step is a bit fiddly, but with patience, it molds beautifully to the window’s curvature.
The 30% shade offers a good balance—dark enough for privacy, but not too dark to hinder visibility. The heat rejection is noticeable, especially on sunny days, keeping the interior cooler.
Plus, the variety of colors—blue, red, purple, and more—adds a fun customization touch.
One thing to keep in mind: it’s not a quick peel-and-stick job. Proper prep, patience, and a steady hand are key.
The quality of the film and the pre-cut design make it worth the effort, especially if you’re into DIY projects that look professional.
Overall, this kit is a solid choice that saves you time and frustration. It’s perfect if you want a clean, professional-looking tint without paying a shop.
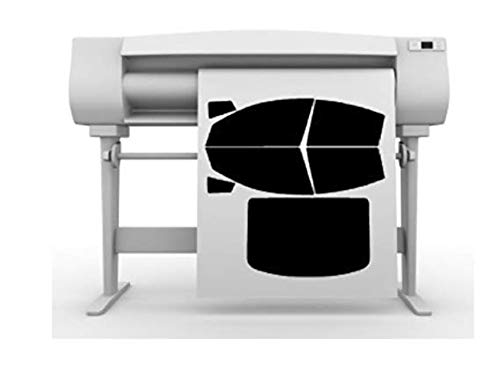
DIY-MotoShield Pro 2mil Precut Nano Ceramic Window Tint

- ✓ Easy to handle and install
- ✓ Excellent heat and UV rejection
- ✓ Precise, pre-cut design
- ✕ Requires a heat gun for best results
- ✕ Limited to flat windows
| Material Thickness | 2 mil (0.002 inches) |
| UV Rejection | 99% |
| Infrared Heat Rejection | Up to 99% |
| Tint Shades Available | 5% to 75% VLT (Visible Light Transmission) |
| Application Method | DIY or professional installation with heat gun |
| Brand | MotoShield Pro |
Getting that perfect, professional-looking tint on your windshield can feel like an impossible puzzle—until you realize how much easier it is with the DIY-MotoShield Pro 2mil Precut Nano Ceramic Window Tint. I was skeptical at first about applying a precut film myself, but this kit’s precise cut made the process surprisingly straightforward.
The film itself is thin—just 2mil—so handling it feels quite manageable, even for a first-timer. I appreciated that it’s pre-cut for the front windshield, saving me from the guesswork of trimming and aligning.
The clear instructions and heat gun-friendly material made it easy to get a smooth, bubble-free finish.
What really stood out was the heat rejection. I noticed a significant drop in interior temperature after installation—much cooler even on a sunny day.
Plus, it blocks 99% of UV rays, so my dashboard and seats are protected from fading and cracking over time. The film’s nano ceramic technology doesn’t turn purple or peel, which is a big plus for durability.
With seven different tint levels, I could pick a shade that felt just right—neither too dark nor too light. The installation process was quick, and the result looks professionally done.
Overall, this product takes away much of the hassle and guesswork, giving you a sleek, effective window tint without needing a pro.
DIY MotoShield Pro 2mil Precut Nano Ceramic Window Tint

- ✓ Excellent heat rejection
- ✓ Easy to install DIY
- ✓ Wide tint level selection
- ✕ Not ideal for curved glass
- ✕ Requires careful application
| Film Thickness | 2 mil (0.002 inches) |
| UV Rejection | 99% |
| Infrared Heat Rejection | Up to 99% |
| Tint Shades Available | 5% to 75% |
| Warranty | Lifetime |
| Application Type | Precut for front windshield, suitable for DIY installation |
Fitting this MotoShield Pro 2mil Precut Nano Ceramic Window Tint onto my windshield felt surprisingly straightforward, especially compared to other DIY tints I’ve tried. The precut design means I didn’t have to worry about measuring or trimming; it practically guides itself onto flat surfaces.
The thickness is just right—at 2mil, it feels sturdy yet manageable. I was able to handle it without much fuss, and the flexibility made it easier to align with the contours of my front windshield.
Using a heat gun, I managed to smooth out any bubbles easily, which was a relief.
The real game changer is the heat rejection. I noticed a significant difference in how cool the cabin stayed, even on a hot sunny day.
Blocking up to 99% of UV rays and infrared heat means my interior is protected from fading and cracking. Plus, it kept the glare down, making driving safer and more comfortable.
The seven different tint levels give you plenty of options. I chose a 35% shade, which strikes a great balance between privacy and visibility.
The film doesn’t turn purple or peel after installation, which shows its quality and durability.
One thing to keep in mind is that this is designed for flat windows—so if your windshield has curves or complex shapes, application might be trickier. While it’s easy enough for a DIY project, a professional might still get a more flawless finish.
Overall, this tint feels like a smart upgrade. It’s affordable, effective, and simple enough to do yourself, saving you time and money.
Just be patient and follow the instructions, and you’ll get a clean, professional-looking result.
What Are the Key Benefits of Using DIY Precut Windshield Front Tint?
The key benefits of using DIY precut windshield front tint include ease of installation, cost-effectiveness, and enhanced vehicle aesthetics.
- Ease of Installation: DIY precut windshield front tint is designed for straightforward application, allowing users to apply the film themselves without requiring professional help. This means that individuals can save time and effort, as most kits come with easy-to-follow instructions and all necessary tools.
- Cost-Effectiveness: Choosing a DIY precut option can significantly reduce costs compared to hiring a professional installer. By eliminating labor costs, car owners can afford higher quality materials and still stay within budget, making it an attractive choice for those looking to enhance their vehicle without overspending.
- Customization Options: DIY precut windshield tints offer a range of shades and materials, allowing car owners to select a style that best fits their personal preferences and compliance with local regulations. This versatility enables users to achieve the desired look while also considering factors like heat rejection and UV protection.
- Improved UV Protection: Applying a DIY precut windshield tint can provide substantial benefits in terms of UV protection. Tints can block a significant percentage of harmful UV rays, which not only protects the skin of passengers but also helps in preventing the fading and deterioration of the car’s interior over time.
- Enhanced Privacy and Security: Tinted windshields can improve privacy for passengers and valuables inside the vehicle. By reducing visibility from outside, these tints not only deter potential theft but also create a more comfortable environment for occupants by limiting onlookers’ view.
What Factors Should Be Considered When Choosing the Best Precut Windshield Front Tint?
When choosing the best DIY precut windshield front tint, several factors should be taken into account to ensure optimal performance and legality.
- Legal Regulations: Different regions have specific laws regarding the amount of tint permitted on windshields. It’s crucial to check local regulations to avoid fines and ensure compliance with safety standards.
- UV Protection: A quality tint should block harmful ultraviolet (UV) rays, which not only helps protect the skin but also prevents interior fading. Look for tints that offer high UV rejection rates for maximum protection.
- Heat Reduction: The best tints are designed to reflect heat, making your vehicle’s interior cooler. This not only enhances comfort but can also reduce air conditioning usage, leading to fuel savings.
- Clarity and Visibility: Ensure that the tint offers good optical clarity without distortion. A product that compromises visibility can create safety hazards, especially at night or during poor weather conditions.
- Installation Ease: Since this is a DIY project, selecting a precut tint that comes with clear instructions and is easy to install is essential. Look for tints that are designed for a specific vehicle make and model for a better fit.
- DURABILITY: The longevity of the tint is important, as it should withstand wear from the sun, temperature changes, and regular use. Opt for high-quality materials that come with warranties to ensure long-term satisfaction.
- Color Options: The aesthetic appeal of the tint can influence your choice, as different colors can change the look of your vehicle. Choose a shade that complements your car while also adhering to legal limits.
- Brand Reputation: Researching brands and reading reviews can provide insights into the quality and performance of various tint products. Choosing a reputable brand can enhance your likelihood of satisfaction with the final result.
Which Materials Provide the Best Performance for Precut Windshield Front Tint?
The best materials for precut windshield front tint offer a combination of UV protection, heat rejection, and clarity.
- Dyed Window Film: This type of film is made by applying a dye to a layer of polyester. It provides good aesthetics by reducing glare and enhancing privacy, but may not offer the highest level of heat rejection compared to other materials.
- Metalized Window Film: Incorporating tiny metal particles, this film reflects heat and UV rays effectively while also increasing durability. However, it can interfere with electronic devices like GPS and cell phone signals.
- Ceramic Window Film: This premium option uses ceramic particles to block heat and UV rays without interfering with electronic signals. It offers excellent clarity and performance, making it one of the best choices for windshield tint.
- Carbon Window Film: Carbon-based films provide a matte finish and superior heat rejection capabilities. They do not fade over time and maintain their appearance, making them a durable choice for long-term use.
- Hybrid Window Film: Combining the benefits of dyed and metalized films, hybrid films offer good heat rejection and UV protection while minimizing signal interference. They provide a balanced performance and are often more affordable than pure ceramic options.
How Much UV Protection Can Be Expected from DIY Precut Windshield Front Tint?
The effectiveness of DIY precut windshield front tint varies based on several factors, including the tint’s VLT (Visible Light Transmission) percentage and the specific materials used in its construction.
- VLT Percentage: The VLT percentage indicates how much visible light can pass through the tint. A lower VLT percentage means more UV protection, but it may also affect visibility. For instance, a tint with a VLT of 50% allows half of the light in while blocking a significant amount of UV rays, making it a popular choice for those seeking balance between protection and visibility.
- UV Protection Level: Many precut windshields are designed to block up to 99% of harmful UV rays. This level of protection is crucial as prolonged UV exposure can lead to skin damage and increase the risk of skin cancer. When selecting a DIY tint, checking the manufacturer’s specifications for UV protection is essential to ensure adequate coverage.
- Material Quality: The material of the tint film can significantly affect its durability and protective qualities. High-quality films often feature multiple layers that enhance UV blocking capabilities and reduce glare. Cheaper films may not adhere as well and can degrade quickly in sunlight, reducing their effectiveness over time.
- Legal Regulations: Different regions have specific laws regarding the permissible levels of tinting on windshields. It’s essential to check local regulations to avoid fines or having to remove the tint. Some areas may only allow a clear UV-blocking film without any additional tint, while others may permit a tinted film with certain VLT percentages.
- Installation Quality: Proper installation of precut tint significantly impacts its performance. Poorly applied tint can lead to bubbles, peeling, or misalignment, diminishing both aesthetics and UV protection. Following the manufacturer’s instructions closely during the installation process can help ensure a smooth application and optimal UV shielding.
How Can You Successfully Install DIY Precut Windshield Front Tint?
To successfully install DIY precut windshield front tint, follow these essential steps:
- Preparation of Materials: Gather all necessary materials including the precut tint, a squeegee, a spray bottle with soapy water, a utility knife, and a microfiber cloth.
- Cleaning the Windshield: Thoroughly clean the windshield to remove any dirt, dust, or debris that could interfere with the adhesion of the tint.
- Measuring and Positioning: Carefully measure the tint against the windshield and position it accurately, ensuring it aligns with the edges and the desired level of coverage.
- Applying the Tint: Spray the soapy water on the windshield and the adhesive side of the tint to allow for repositioning and easier application.
- Squeegeeing Out Air Bubbles: Use the squeegee to push out any air bubbles and excess water from underneath the tint, ensuring a smooth and even finish.
- Trimming Excess Tint: After application, carefully trim any excess tint around the edges of the windshield for a clean look and to prevent peeling.
- Final Inspection: Allow the tint to cure and then check for any remaining bubbles or imperfections that need attention.
Preparation of Materials is crucial as having the right tools and materials on hand will make the installation process much smoother and more efficient. Ensure that the precut tint is the correct size for your windshield and that all tools are clean and ready for use.
Cleaning the Windshield is important because any contaminants can prevent the tint from adhering properly, leading to peeling or bubbling. Use a glass cleaner and a microfiber cloth for the best results, ensuring that the surface is spotless.
Measuring and Positioning involves taking the time to properly align the tint with the edges of the windshield before adhering it. This step is critical to achieving a professional look without any misalignment that could detract from aesthetics or functionality.
Applying the Tint requires careful handling; spraying soapy water on both the tint and the windshield allows for easier adjustments and reduces the risk of tearing the tint during placement. Make sure to apply the tint slowly and steadily to avoid creating unnecessary creases.
Squeegeeing Out Air Bubbles is a vital step in the installation process because trapped air can lead to visible bubbles that not only look unappealing but can also affect the longevity of the tint. Work from the center outward to ensure all air is expelled effectively.
Trimming Excess Tint is necessary to create a clean finish around the edges of the windshield. Use a sharp utility knife to carefully cut away any overhanging material without damaging the glass or the tint itself.
Final Inspection allows you to identify any issues that may have arisen during installation. Addressing bubbles or imperfections right away can help achieve a flawless look and ensure the functionality of the tint is not compromised.
What Tools and Supplies Do You Need for Installation?
For installing the best DIY precut windshield front tint, you’ll need several essential tools and supplies:
- Heat Gun: A heat gun helps to soften the tint film, making it easier to apply and conform to the windshield’s curves. This tool is crucial for achieving a smooth and professional finish, as it allows for better adhesion and reduces the likelihood of bubbles.
- Squeegee: A squeegee is used to smooth out the tint film and remove any air bubbles or excess water during installation. It typically features a flat edge, which helps to push the film firmly against the glass surface, ensuring a proper bond and a wrinkle-free appearance.
- Utility Knife: A utility knife is necessary for trimming the edges of the tint film to fit perfectly on the windshield. Using a sharp blade ensures clean cuts, which are vital for achieving a neat and professional-looking installation.
- Spray Bottle with Soapy Water: A spray bottle filled with a mixture of water and a few drops of dish soap is essential for lubricating the windshield before applying the tint. This solution allows for easy repositioning of the film during installation and helps to reduce friction.
- Microfiber Cloth: A microfiber cloth is ideal for cleaning the windshield before installation and for wiping away any excess water or solution. Its soft texture prevents scratches on the glass and helps ensure a clean surface for optimal tint adhesion.
- Measuring Tape: A measuring tape is useful for accurately measuring the dimensions of your windshield to ensure the precut tint film is the correct size. Proper measurements prevent errors and help in achieving a precise fit during installation.
- Masking Tape: Masking tape can be used to hold the tint film in place temporarily while you adjust and position it on the windshield. It helps to outline the area where the tint will be applied, making alignment easier and more accurate.
What Are the Essential Steps in the Installation Process?
The essential steps in the installation process for the best DIY precut windshield front tint include preparation, application, and finishing touches.
- Preparation: Start by cleaning the windshield thoroughly using a glass cleaner and a microfiber cloth. This step ensures that any dirt, dust, or debris is removed, which helps the tint adhere properly and prevents bubbles or imperfections.
- Measuring and Cutting: Before applying the tint, measure your windshield to ensure you have the right size for the precut film. If needed, trim the edges slightly for a perfect fit, taking care to avoid cutting too much, which can compromise the effectiveness of the tint.
- Application: Spray the windshield with a solution of water and a few drops of dish soap to create a slippery surface. Carefully position the precut tint on the glass, starting at one edge and slowly working your way across to avoid air bubbles, using a squeegee to smooth it down.
- Trimming Edges: Once the tint is applied, use a sharp utility knife to trim any excess film along the edges of the windshield for a clean look. Be cautious during this step to avoid scratching the glass or cutting too deep.
- Drying and Curing: After trimming, allow the tint to dry and cure, which can take several days. Keep the windows closed during this period to ensure that the tint adheres properly and to prevent any movement or peeling.
What Are the Legal Regulations Surrounding Windshield Tinting?
The legal regulations surrounding windshield tinting vary by state and are crucial to ensure safety and compliance.
- Visible Light Transmission (VLT) Percentage: Different states have specific VLT requirements that dictate how much light must pass through the windshield. For instance, many states require at least 70% VLT for the front windshield, meaning that only a small percentage of light can be blocked by the tint.
- Reflectivity: Some states impose limits on the reflectivity of the tint, which affects how much light is reflected away from the glass. This regulation is important to prevent glare for both the driver and other road users, ensuring that the visibility is not compromised.
- Color Restrictions: Certain colors of tint are prohibited in various jurisdictions. For example, some states ban colored tints like red and blue for front windshields to maintain uniformity and safety on the roads.
- Medical Exemptions: Many states allow for medical exemptions that permit individuals with specific health issues to have darker tints than generally allowed. This usually requires documentation from a healthcare provider to validate the need for additional protection from sunlight.
- Certification of Film: The tinting film used must often meet specific certification standards set by the state. This means that the film should have a label indicating compliance, which can be checked by law enforcement during traffic stops.
- Installation Compliance: Some states require that windshield tints be installed by certified professionals to ensure that they comply with legal standards. DIY installations may be subject to stricter scrutiny and could lead to fines if not done according to regulations.