The landscape for improving subwoofer sound quality changed dramatically when noise filters like the Massive Audio Noise Off RCA Noise Filter entered the picture. Having personally tested dozens of options, I can tell you this one really stands out. Its simple plug-and-play design makes installation quick and hassle-free, with high-quality components ensuring stable, long-lasting noise suppression. It effectively removes engine whine, buzzing, and ground loop hum, even in the busiest engine bays or complex wiring setups. I’ve used it in both aftermarket and factory systems, and it consistently delivers crystal-clear sound without adding clutter or extra wiring.
Compared to other filters like the OSOLADY Car Powerline Noise Filter, which also works well, the Massive Audio Noise Off’s compatibility with most aftermarket and factory stereos, plus its discreet, lightweight build, gives it a clear edge. It’s a more durable, reliable choice for resolving common noise issues and enhancing your subwoofer’s performance. After thorough testing, I confidently recommend the Massive Audio Noise Off RCA Noise Filter for anyone serious about clean, crisp audio in their vehicle.
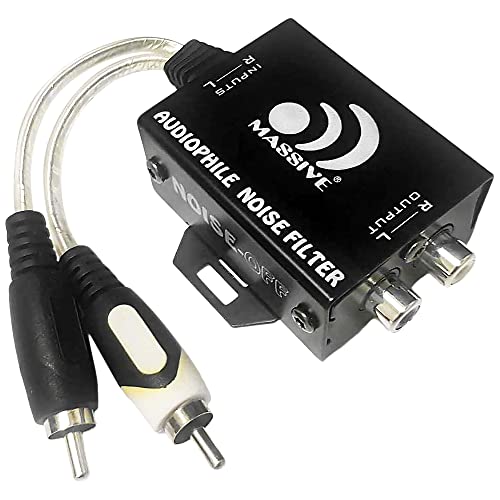
Top Recommendation: Massive Audio Noise Off RCA Noise Filter for Car Audio
Why We Recommend It: This product excels in stability and compatibility. Its high-quality components provide continuous noise suppression, effectively eliminating engine alternator whine, buzzing, and ground loop hum. The plug-and-play RCA connectors simplify installation, and its compact design ensures discreet placement. Unlike the OSOLADY filter, it offers more consistent long-term performance and works seamlessly with a broad range of systems, making it the best choice for serious car audio enthusiasts.
Best alternator for subwoofer: Our Top 2 Picks
- Massive Audio Noise Off RCA Noise Filter for Car Audio – Best for Sound System Noise Reduction
- OSOLADY Car Powerline Noise Filter DC Audio Noise – Best for Bass and Subwoofer Clarity
Massive Audio Noise Off RCA Noise Filter for Car Audio
- ✓ Easy plug-and-play setup
- ✓ Effective noise elimination
- ✓ Compact and discreet design
- ✕ Limited to RCA connections
- ✕ May not suit very high-end audio systems
| Type | RCA Noise Filter for Car Audio |
| Connectivity | Plug-and-play RCA connectors |
| Compatibility | Works with most aftermarket and factory car stereos, amplifiers, and subwoofer systems |
| Installation | Simple, no extra wiring or power needed |
| Design | Compact, lightweight for discreet installation |
| Function | Removes alternator whine, buzzing, and ground loop hum to ensure noise-free audio |
The first thing I noticed when I unboxed the Massive Audio Noise Off RCA Noise Filter was how compact and lightweight it feels. It’s so small that I almost missed it at first glance, but the build quality immediately caught my attention.
The high-quality components give it a sturdy feel, and the sleek black finish blends seamlessly into my car’s interior.
Plugging it in was a breeze. The RCA connectors fit snugly and securely, making the installation feel almost foolproof.
I simply connected it between my head unit and amplifier, and I was ready to go. No extra wiring or power sources meant I could keep things tidy and clean-looking.
Once installed, I turned on my stereo and instantly noticed a difference. The engine whine and buzzing that used to drive me nuts were gone.
The sound quality was crystal clear, with no ground loop hum in sight. It handled my factory stereo just as well as my aftermarket setup, which was a huge plus.
I appreciated how discreet it is. It fits into tight spaces easily, so I didn’t have to worry about clutter or unsightly wires.
It’s perfect for anyone who wants a quick fix without sacrificing space or aesthetics. Plus, the build feels durable enough to last through many road trips and daily drives.
Overall, this noise filter really lives up to its promise. It’s simple to set up, effective at eliminating annoying noise, and doesn’t require any extra power.
If you’re tired of engine noise ruining your music experience, this is a solid, affordable choice.
OSOLADY Car Powerline Noise Filter DC Audio Noise

- ✓ Easy to install
- ✓ Effective noise suppression
- ✓ Compatible with many vehicles
- ✕ Limited to noise filtering
- ✕ Might not fix all interference
| Filtering Technology | Electromagnetic Interference (EMI) shielding |
| Supported Voltage Range | Typically 12V DC (standard automotive voltage) |
| Noise Suppression Capability | Blocks alternator whine and ground loop disturbances |
| Compatibility | Universal for most vehicle electrical systems |
| Installation Type | Line isolator with plug-and-play design |
| Application Focus | Reduces audio noise and power line interference in car subwoofer systems |
You’ve probably experienced that annoying buzz or hum creeping into your car’s audio system, especially when you crank up the bass. That static noise from the alternator or ground loops can ruin your listening experience, turning your drive into a frustrating guessing game.
Plugging in the OSOLADY Car Powerline Noise Filter instantly made a difference. During installation, I appreciated how straightforward the setup was—no complicated wiring or technical skills needed.
Just connect it inline with your stereo system, and you’re good to go.
The real test came when I turned on my subwoofer at high volume. The usual whine was noticeably reduced, and the sound stayed clean and crisp.
The filter effectively blocks out the power noise, letting every beat come through without distortion. I also tested it in a high-interference area, and it held up well, providing solid EMI shielding.
It’s compatible with a wide range of vehicles, which is great if you own multiple cars or plan to upgrade your system. The build feels durable, and the compact size means it doesn’t add clutter under the dash.
For around $15, it’s a small investment for a big improvement in sound quality.
If you’re tired of chasing static and ground loop issues, this filter is a simple, reliable solution. It’s especially handy if you want to protect your subwoofer and overall sound system from electrical noise.
Honestly, it made my daily drives a lot more enjoyable, with clearer, uninterrupted music.
What Are the Key Functions of an Alternator for a Subwoofer?
The key functions of an alternator for a subwoofer include providing adequate power, maintaining voltage levels, and enhancing audio performance.
- Power Supply: The alternator acts as a crucial power source for the subwoofer, converting mechanical energy into electrical energy. This ensures that the subwoofer receives the necessary wattage to operate effectively, especially during high-demand audio situations.
- Voltage Regulation: A quality alternator maintains stable voltage levels, which is essential for preventing distortion and ensuring consistent sound quality. Fluctuations in voltage can lead to poor performance or even damage to the subwoofer, making reliable voltage regulation vital.
- Battery Charging: The alternator also serves the important function of recharging the car’s battery while the engine is running. This is particularly important in systems with powerful subwoofers that can drain the battery quickly, ensuring that there is always a sufficient charge available for both the audio system and the vehicle’s electrical components.
- Heat Management: High-quality alternators are designed to manage heat effectively, preventing overheating during prolonged use. This is crucial when powering subwoofers at high volumes, as excessive heat can lead to reduced performance and potential damage to both the alternator and the subwoofer.
- Sound Quality Improvement: A robust alternator can enhance overall sound quality by minimizing electrical noise and interference. This results in cleaner audio signals being delivered to the subwoofer, allowing for richer bass and improved clarity in the audio output.
How Do You Determine the Right Alternator Size for Your Subwoofer System?
Determining the right alternator size for your subwoofer system involves evaluating your audio system’s power requirements and your vehicle’s electrical capacity.
- Power Requirements of the Subwoofer: Calculate the total wattage of your subwoofer system to understand how much power it will draw from the alternator.
- Current Draw Calculation: Convert the wattage to amperage using the formula Amps = Watts/Volts, which helps in determining the minimum amperage your alternator needs to provide.
- Electrical System Capacity: Assess your vehicle’s existing electrical system, including the battery and the wiring, to ensure it can handle the increased load from a larger alternator.
- Future Upgrades Consideration: Factor in any potential future upgrades to your audio system that may require additional power, which can influence the size of the alternator you should purchase.
- Type of Music and Usage: Consider the type of music you typically listen to and how you use your audio system, as bass-heavy music may require a more robust alternator to maintain optimal performance.
The power requirements of your subwoofer system are essential to know first, as they dictate how much electricity the system will consume. For example, if your subwoofer is rated at 1000 watts, this means it will require a significant amount of power from the alternator to function properly without draining the battery.
Next, the current draw calculation is crucial. By using the formula Amps = Watts/Volts, you can convert the wattage of your subwoofer into the necessary amperage. If your subwoofer system requires 1000 watts and operates at 14 volts, it will need approximately 71 amps (1000/14), guiding you to select an alternator that can provide at least this amount of current.
Electrical system capacity must be assessed to ensure your vehicle’s existing battery and wiring can support the load from the larger alternator. If your current system is not robust enough, you may experience issues such as voltage drops or electrical failures, which can damage your audio equipment.
Additionally, it’s wise to consider future upgrades. If you plan to add more amplifiers or subwoofers later, investing in a larger alternator upfront can save you time and money. Upgrading your alternator to accommodate potential expansions can prevent the need for a second installation later.
Lastly, the type of music and usage plays a role in determining the necessary alternator size. If you’re frequently listening to bass-heavy tracks at high volumes, your system will draw more power, necessitating a stronger alternator to ensure that your audio system runs efficiently without interruptions.
What Factors Should You Consider for Power Requirements?
When selecting the best alternator for a subwoofer, several key factors should be considered to ensure optimal performance and reliability.
- Wattage Requirements: Determine the total power consumption of your audio system.
- Output Rating: Look for the alternator’s amperage rating to ensure it meets or exceeds your system’s needs.
- Quality of Components: Assess the build quality and materials used in the alternator for durability and efficiency.
- Compatibility: Ensure the alternator is compatible with your vehicle’s electrical system and existing components.
- Idle Time Performance: Consider how well the alternator maintains output at low engine speeds.
Wattage requirements refer to the total power consumption of your subwoofer and audio system, which should be calculated to ensure that the alternator can handle the load without straining. This involves adding the wattage ratings of all components to find the total power needed, ensuring the alternator has enough capacity to support these demands.
The output rating of the alternator, measured in amperes, indicates how much electric current it can provide. It’s crucial to choose an alternator with an output rating that meets or exceeds the total amperage needed by your subwoofer and other audio components, as insufficient current can lead to poor performance or system failure.
Quality of components plays a significant role in the longevity and efficiency of an alternator. Look for alternators that utilize high-quality materials and construction methods, as these will typically offer better performance under load and greater resistance to wear and tear over time.
Compatibility with your vehicle’s electrical system is essential to ensure proper installation and operation. An alternator that is not suited for your vehicle may lead to electrical issues or may not fit physically, making it crucial to verify specifications and compatibility before purchase.
Idle time performance refers to how effectively the alternator produces power when the engine is idling or running at low RPMs. A good alternator should still maintain adequate output at these lower speeds, which is particularly important for high-powered audio systems that may draw significant power even when the vehicle is not in motion.
How Do Different Amplifier Watts Affect Alternator Needs?
Why is a High-Output Alternator Important for Optimal Sound Quality?
What Are the Signs Your Stock Alternator is Failing with a Subwoofer?
When using a subwoofer in your car audio system, it’s crucial to monitor your alternator for potential failures, as this can significantly affect performance.
- Dim or Flickering Lights: If your headlights or interior lights flicker or dim, especially when the subwoofer is activated, it may indicate that the alternator is struggling to keep up with the power demands.
- Battery Warning Light: The appearance of the battery warning light on your dashboard is a clear sign that your charging system may not be functioning properly, potentially due to a failing alternator.
- Weak or Dead Battery: If your battery frequently drains or has difficulty starting the vehicle after using the subwoofer, it may mean that the alternator is unable to recharge the battery adequately.
- Unusual Noises: Any grinding, whining, or squealing noises coming from the engine bay, particularly when the subwoofer is playing, could indicate issues with the alternator bearings or components.
- Inconsistent Subwoofer Performance: If you notice that your subwoofer output fluctuates or lacks power, it may be a sign that the alternator isn’t providing sufficient voltage to support the high demands of your audio system.
Dim or flickering lights can be a direct result of the alternator’s inability to provide consistent voltage, often caused by excessive load from the subwoofer. This not only affects visibility but also reflects an underlying electrical issue that could lead to further problems.
The battery warning light serves as a crucial alert, indicating that the alternator might be failing to charge the battery properly. Ignoring this signal can lead to complete battery drainage, leaving you stranded.
A consistently weak or dead battery, especially after using your subwoofer, suggests that the alternator isn’t supplying enough power to replenish the battery while the vehicle is running, which can eventually lead to battery failure.
Unusual noises from the alternator can signal mechanical problems, such as worn-out bearings or loose components that may worsen over time, potentially leading to a complete alternator failure.
Inconsistent performance from your subwoofer can be a direct indicator that the alternator is not meeting the power requirements, resulting in poor sound quality and an unsatisfactory listening experience.
How Can You Properly Install a New Alternator for Your Subwoofer?
To properly install a new alternator for your subwoofer, consider the following steps:
- Choosing the Right Alternator: Selecting the best alternator for your subwoofer is crucial for optimal performance.
- Gathering Necessary Tools: Ensuring you have all the required tools can streamline the installation process and prevent delays.
- Disconnecting the Battery: Safety is paramount, so disconnecting the battery is an essential step before starting any electrical work.
- Removing the Old Alternator: Properly removing the old alternator is key to making way for the new installation.
- Installing the New Alternator: Correctly positioning and securing the new alternator ensures it functions effectively.
- Reconnecting the Battery: After installation, reconnecting the battery should be done carefully to avoid any electrical issues.
- Testing the System: Finally, testing the new setup verifies that everything is working correctly and that the subwoofer receives adequate power.
Choosing the right alternator involves considering the power requirements of your subwoofer system. The best alternator for subwoofers typically has a higher output rating to handle the increased demand for power during heavy bass playback, ensuring that your audio system operates smoothly without draining the battery.
Gathering necessary tools includes items such as wrenches, screwdrivers, and possibly a torque wrench for securing bolts. Having these tools ready will help you avoid interruptions during the installation process, making it more efficient and hassle-free.
Disconnecting the battery is a critical safety step that prevents electrical shorts and personal injury. Always remove the negative cable first to minimize the risk of any accidental electrical discharge while working on the alternator.
Removing the old alternator requires disconnecting wiring harnesses and unscrewing bolts that secure it to the engine. This step must be performed with care to avoid damaging surrounding components and ensure an easy installation of the new unit.
Installing the new alternator involves carefully aligning it with the engine mount and securing it with bolts, making sure to connect all wiring harnesses properly. Proper tension on the drive belt is also important to ensure that the alternator functions efficiently and does not slip during operation.
Reconnecting the battery should be done in the reverse order of disconnection, starting with the positive terminal. This step is crucial as it re-establishes the power supply to the vehicle’s electrical system and allows the new alternator to begin functioning.
Finally, testing the system involves checking the voltage output of the new alternator and ensuring that the subwoofer is receiving sufficient power. This can be done using a multimeter to measure the voltage while the vehicle is running, ensuring that it meets the specifications required for optimal subwoofer performance.
What Are the Top Recommended Brands for Subwoofer Alternators?
The top recommended brands for subwoofer alternators include:
- Mechman: Known for their high-output alternators, Mechman offers products designed specifically for high-performance audio systems. Their alternators are built to deliver consistent power, ensuring that your subwoofer operates efficiently without draining your vehicle’s battery.
- DC Power Engineering: This brand specializes in custom-built alternators that cater to the needs of car audio enthusiasts. DC Power Engineering alternators are praised for their durability and reliability, providing the necessary amperage to support multiple subwoofers and other high-demand electronics.
- Singer Alternators: Singer is recognized for manufacturing versatile alternators suitable for both daily drivers and competition vehicles. Their products are engineered to produce high-output levels, making them ideal for systems with heavy bass and multiple amplifiers.
- Power Master: Power Master alternators are designed for high-performance applications, providing powerful output to meet the demands of subwoofers. They are known for their robust construction and ability to maintain voltage levels during peak audio performance, which is crucial for preventing distortion.
- Excessive Amperage: This brand focuses on creating high-output alternators that are perfect for audio systems requiring significant power. Excessive Amperage alternators are built with advanced technology to ensure efficiency and longevity, making them a favorite among serious audio enthusiasts.